Introduction
Want to earn money online? Looking for ways to generate passive income?
In this post, we’ve shared multiple ways on how to add Google AdSense to WordPress. One of the easiest and most common ways to start earning online is to monetize your website by running ads. Google AdSense is a remarkable platform that allows you to do that. But how can one use it? What is the procedure and most importantly, how to connect it with your website?
Still need to create your WordPress website? Check out this tutorial to set one up for free.
What is Google AdSense?
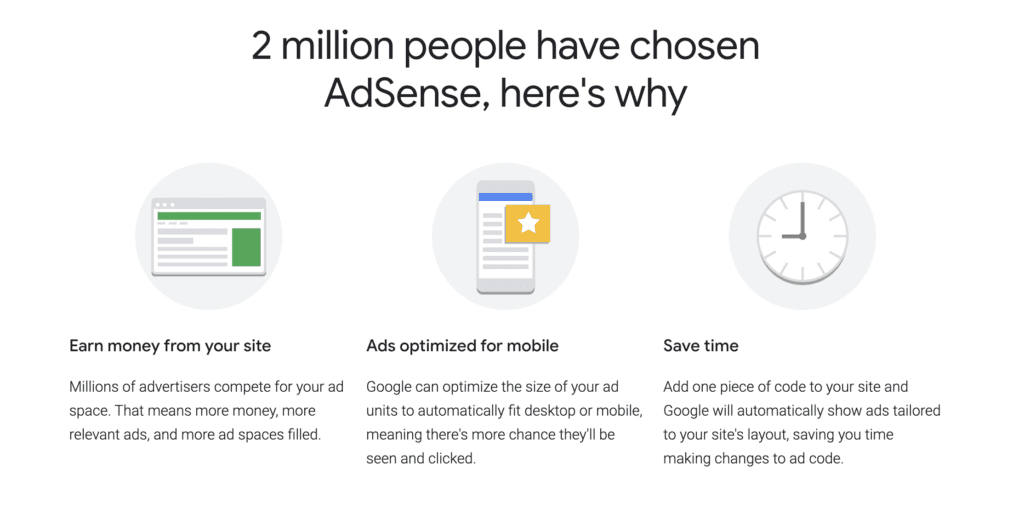
If you’re thinking of making money from your online blog, one of the easiest and most trusted platforms is Google AdSense. It is an advertising network that allows content creators to show text, images, and video-based interactive ads on their websites. These ads are based on your browsing history and interactions by visiting different sites.
Google AdSense makes advertising very easy as you don’t have to worry about payments nor deal with advertisers. It also allows you to manage what kind of ads you want to showcase on your website. For example, if you’re running a fashion-related blog, then you can customize AdSense with fashion-related ads and terminate all the other categories.
Google AdSense vs Google Adwords
One area where content creators struggle a bit is understanding the difference between Google AdSense and Google Adwords. Google Adwords is the complete opposite of Google AdSense. Instead of allowing you to display Ads, Google Adwords lets you create ads so other publishers can use them and showcase on their website.
Now back to Google AdSense
Why use Google AdSense?
Google AdSense is not the only program that allows you to display ads. There are hundreds of other platforms in this category. But what sets AdSense apart from the rest is the ability to automate advertising. It is as simple as just copying a piece of code and pasting it on your website.
Speaking of copying the code, this is why you’re here in the first place. Now to get started with Google AdSense, you must be running some sort of Website or online Blog. Google AdSense is supported by most online Content Management Systems like WordPress, Joomla, Shopify, Magento, and others. This guide is specifically for WordPress users as it is one of the most used CMS platforms.
However, once you understand the essentials, you can use it on other platforms as well.
Getting Started with Google AdSense
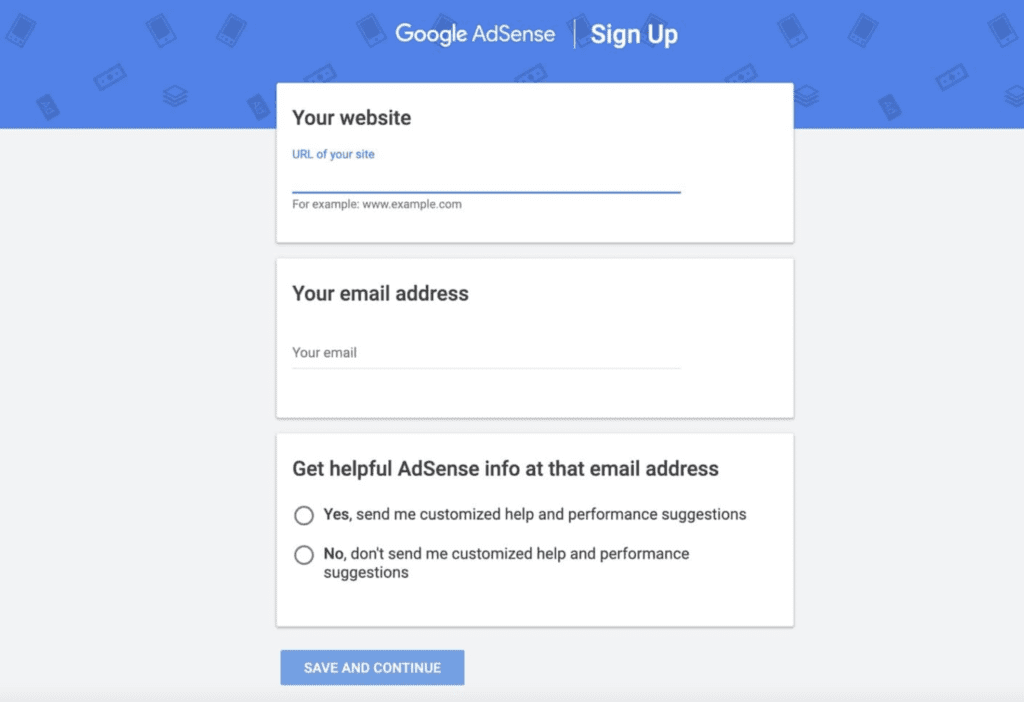
To get started, you first have to sign up with the Google AdSense program. For this, you have to use your valid Gmail ID and fill out the application requirements. Select your country, read the terms and conditions and click on Create Account.
Once you sign up with AdSense, you have to verify your site performance and get your account approved. Sometimes, Google can also reject your account approval and will state the reason why the account is not approved. If this does happen, follow the changes required by Google and reapply.
If your website is completely new, it’s got a higher chance that Google will reject it. AdSense requires you to serve your audience with quality content. Since your website is new, there’s not much traffic you’re generating. So, instead of reapplying instantly, try to optimize your website and improve its performance. Add more content, make sure it’s not plagiarized and improve your SEO statistics.
Once you’re confident your site will get the approval, reapply and it will surely work.
Recently, Google AdSense has introduced auto ads, meaning that you just have to copy and paste the code on your website and Google will decide when and where to show the ads. If you’re new to Google AdSense, we’ll recommend using the auto functionality and getting to know the system.
However, you can still use the manual submission and individually place ads on your website. Below we’ve shared both methods so you can check which one works best for your website.
Using AdSense Auto-Ads in WordPress
Follow this step-by-step guide to automatically connect Google Adsense to WordPress.
Step 1: Sign in with Google Account
First, sign in with your Google AdSense account. If you don’t have a Google AdSense account, then click on the Sign-Up button and follow the wizard instructions.
Step 2: Copying the AdSense Code
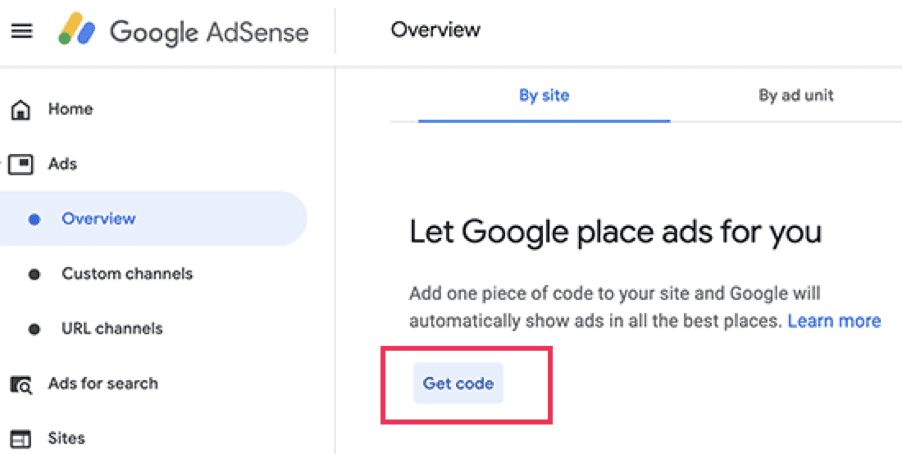
Once you’re logged in, go to the Overview section on the left-side panel and click on the Get Code button. Next Google will generate the AdSense code for you to use on your website. Copy the code from the following panel.
Step 3: Inserting the Code in Header and Footer
Next, go to your WordPress website dashboard, and go to the Header and Footer section. Now, this step is different for individual users, as you might be using a different theme. By default, WordPress doesn’t have a Header and Footer section and this functionality is mostly provided by your Theme provider. If you can’t find this section, then install a Headers and Footers Plugin.
Step 4: Using the Auto-Ads code in WordPress
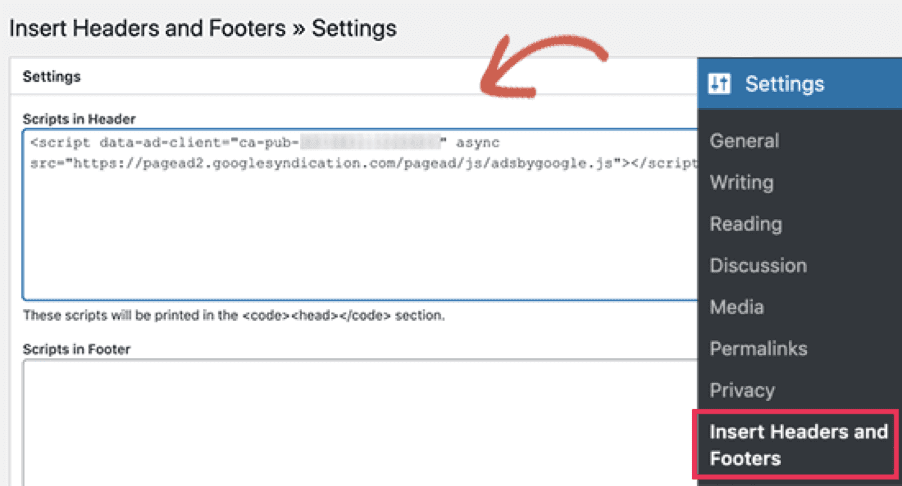
Now, place the code in the header and footer section. You can also add your AdSense code, directly into the Header section. But if you update your website and make changes, chances are it will be removed and you have to manually add it again.
On the other hand, if you want to add code manually on your website, then follow the next method.
Manually Adding AdSense Code in WordPress
If you prefer to do things completely yourself, here are the steps on how to manually connect Google AdSense to WordPress.
Step 1: Creating a New Ad Unit

Go to Google AdSense and Click on the Ads button at the left-hand menu. Now, click on ‘By Ad Unit’ and select the new ad unit of your choice.
Step 2: Selecting Ad Unit
There are 3 options listed in this section, you can either make Display ads, in-feed ads, or In-article Ads. Google recommends you to use display ads since it’s the most basic one. Click on the Display Ad button and Google will showcase you a preview of what a typical Ad will look like.
Step 3: Saving the Preferences
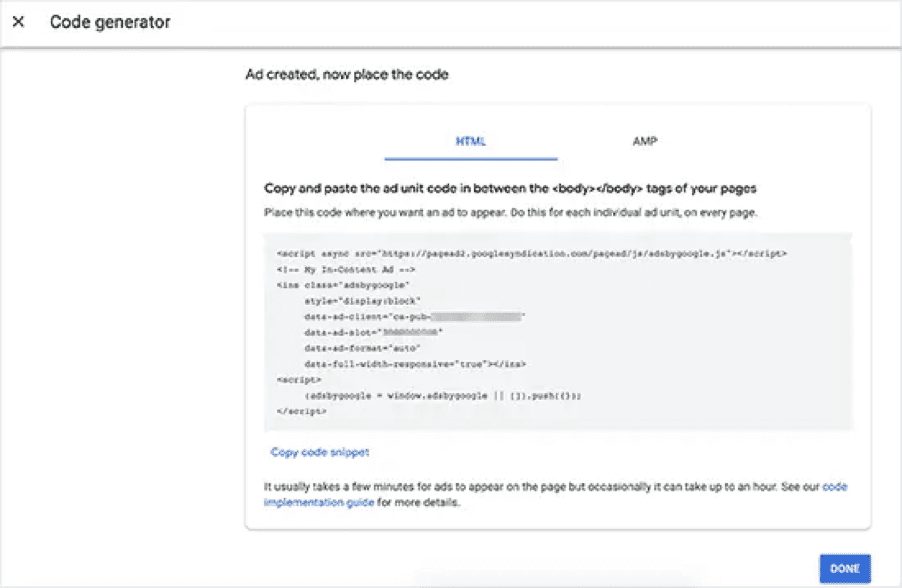
Enter the Ad name at the top left corner and then select the orientation. After this, select the Ad Size or use the default Responsive size. Click on the ‘Create’ button and then click on the ‘Copy Code snippet’ button.
Now, AdSense will generate a code for you with a unique Ad and Publisher ID. You can use this code again on your website by selecting the Ad name you just created.
If your website has Google AMP support, then copy the code in the AMP pages. Otherwise, save the code in your computer. Next, you’ll have to decide where you want your ad to appear.
Step 4: Adding Display Ad Code in WordPress
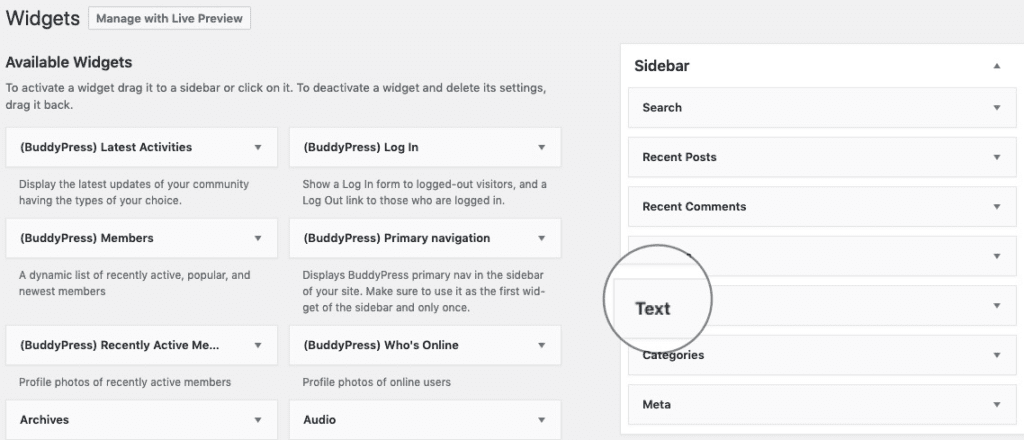
Now, you have to determine where you want the ad to appear. You can use these ads on your website’s individual page, post, header, footer, etc. Most publishers display ads on the sidebar. If you want your ads to appear in the sidebar, then you can place the ad code in the WordPress widgets section.
To do this, simply go to your website Dashboard, select Appearance > Widget, and copy/paste the Ad unit code. Name the Widget so you can easily navigate it next time. Drag and Drop the widget on the area you want it to display and save changes.
That’s it! Now your website will display Google AdSense Ads. Now, go ahead and verify the placement from Google AdSense.
Verifying Display Code in AdSense
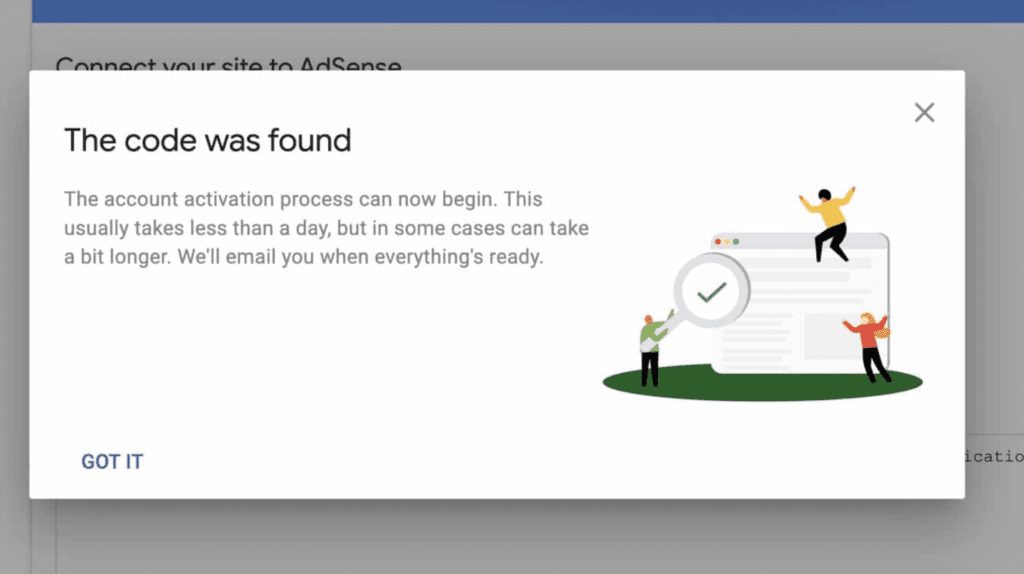
Whether you’ve used the auto method or the manual one, it is always recommended to verify your code from AdSense. For this, go back to Google AdSense and check “I’ve pasted the code into my side”
Now, Google will check your website and let you know if the code is found.
Using the Plugin to Display AdSense Ads
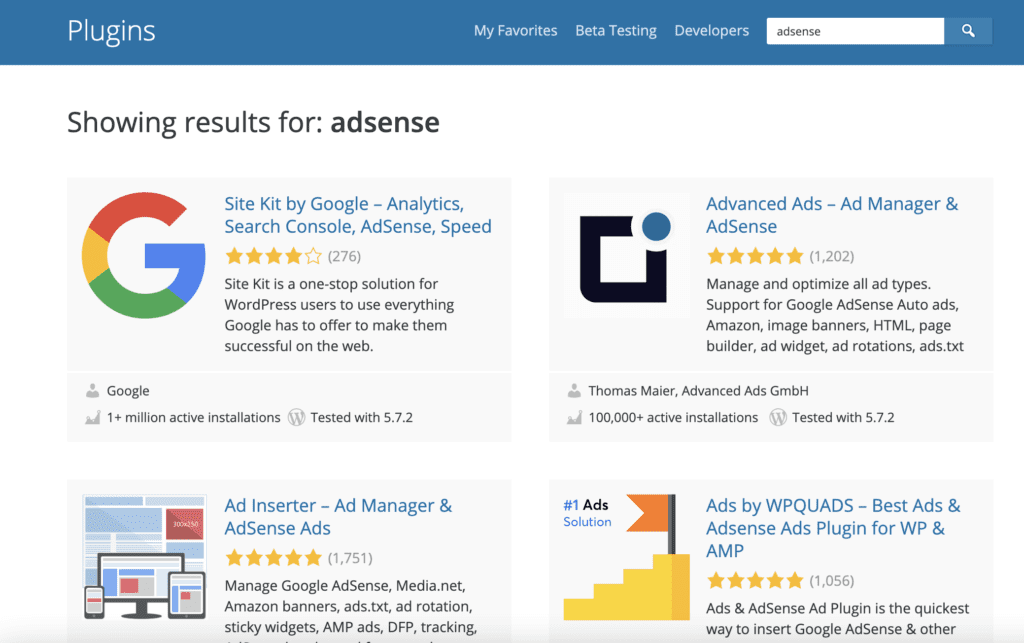
One of the best features of WordPress is that you can find tons of plugins. The same goes for AdSense, there are tons of plugins available for this, from managing performance to displaying ads on individual pages and posts.
To use it, go to the Plugins section and click on Add New button. Now, enter AdSense and you’ll find hundreds of plugins you can download.
Remember, Google AdSense can take an hour to determine your website and display associated ads. Don’t worry if you see blank texts or banners on the first try.
Creating different Layout in AdSense
We’ve only used the default Display Ad feature in AdSense. You can also use in-feed ads, in-article ads, or make your own one with custom settings. To do this:
Go to Google AdSense and Click on My ads > Content > Ad unit and Select New Ad Unit.
Give your Ad a new name, Select the Ad Type and Size. You can also make a new style, change color, and do a lot of other interesting new things.
Alternatively, you can also use WordPress plugins to make customizable ads. Ad Inserter plugin is fairly popular in this regard that comes with a lot of different functionalities you can check. Go ahead and play around with the settings and see what best suits your website.
Understanding Google AdSense and WordPress
Now that you’re all set and placed your first AdSense ad on your website, your work isn’t done. In fact, it’s just started!
If you want your ads to generate maximum revenue, you have to monitor and maintain your website. Check your earnings daily and see which page works the best. Test different placements, ad types, and layouts to see where you can get the maximum benefit. If an ad unit is working better for you, just replicate it on other locations of your website.
Spending time on optimization and placement is the key highlight of using AdSense. And it’s not a one-time gig, it can take months before you realize which placement works the best.
Now you know how to connect Google AdSense and WordPress, and how to display Ads on your website. Below we’ve shared some common FAQs associated with Google AdSense. If you have any questions, do let us know down in the comment section.
AdSense best practice Frequently Asked Questions
What is the best size for AdSense Ad?
The best size for Google AdSense display ads is 300×250. It is the most optimal size for all screen types and tends to sit well with the pay rate.
What is RPM in Google AdSense?
RPM stands for Revenue Per Mille. It is a revenue-based metric used by Google AdSense to calculate impressions per second. To calculate RPM, multiply the cost per click and the total number of clicks and then divide it with a total number of page views. RPM is also calculated by revenue per 1000 impressions, but the metric is highly dependent on your average keyword CPC.
What is CTR in Google AdSense?
CTR stands for Click-Through-Rate. It is an ad-related metric that determines how much revenue you’ve generated per click on your ad. The ads listed on your website depend on a lot of factors like your audience, website topic, ad type, ad placement, and more. The ideal CTR is hard to determine, but you can use Google Adword to check the average bidding cost per keyword.
Google AdSense also has a built-in tool that determines the ongoing rate of CTR on your website. In case, your website gets a little dominated, AdSense will prompt a message to possible optimize and improve your ad experience. You can follow this guide to improve your ad performance.
What is the best placement for Google AdSense?
This is what you have to test on your own because every website layout is different. The ideal goal is to get more clicks so place your ads in an area where you get the most traffic. Studies show that ad placement associated with your website content gets the most clicks.
This includes the widgets at the corner and in-between text. One thing worth mentioning here is that Google AdSense is very strict in terms of ad placement. It will instantly deactivate your account if you try to spam it. So, play it safe, and follow the Terms of Service before you place an ad order.